


We’re really excited to announce our latest VisiPoint update which includes 4 new features that our team have been working relentlessly on for the last few months:
- Users Not On-Site – View a report of staff that are not signed in at any given time
- Attendance Modes – Set work schedules so anyone signing in late or signing out early will need to give a reason for their absence e.g. medical appointment
- User Access Levels – Assign different permissions levels to users when granting access to your management dashboard
- MIS Integration – Integrate with school MIS systems to sync your pupil and staff data (UK schools only)
Please note that these features are available only with a VisiPoint subscription. If you have a free VisiPoint license (standalone license) included with purchases of our Zentron kiosks, you will need to upgrade to a VisiPoint subscription to use these features. For GBP prices click here, for USD prices click here.
For customers that originally purposed Zentron kiosks temperature scanning on entry during COVID-19, this enables you to repurpose your devices as a visitor and employee management system.
Keep reading to learn more about these new features. You can easily skip to the relevant parts for you by clicking the links below:
Users Not On-Site Report
With this new report, you can quickly and easily generate a list of users that are not signed into your facilities at any given time. This can help you identify which staff members have not signed into work that day, perhaps due to absence or those who are working off-site.
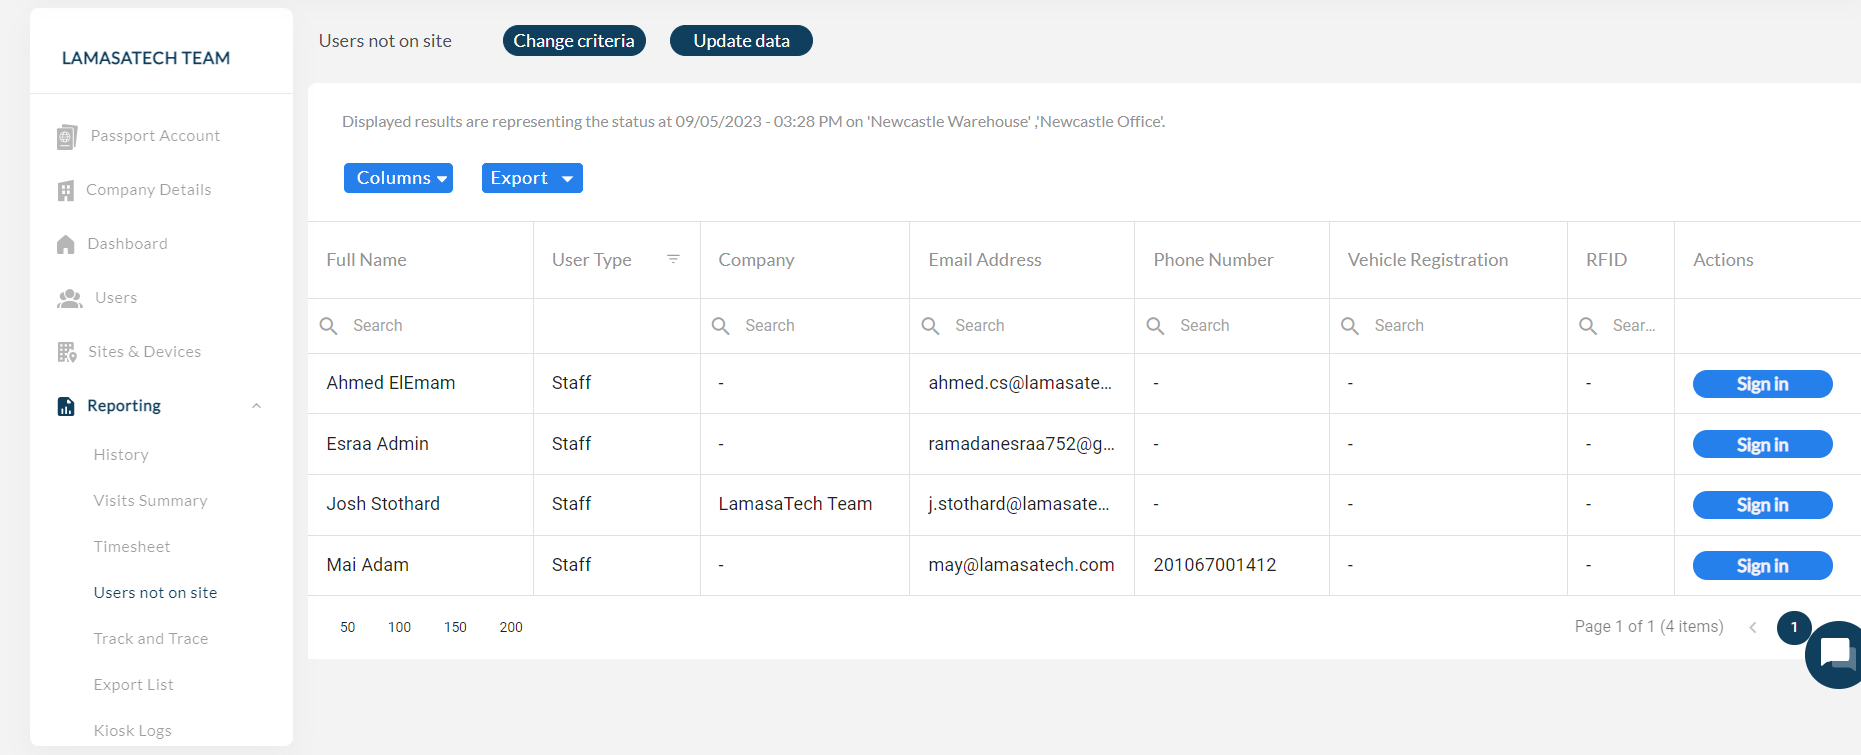
Knowing exactly who isn’t signed into your building means you will be able to spot any unexpected or unknown absences. For example, if the report shows you that you have three employees not signed in, and you know one is on annual leave and one is working off-site, you will see that you have another with an unknown absence. You’ll know to contact the person who is absent without reason.
With this, you’ll be able to provide a better duty of care to your employees as you’ll know who you need to check up on if they haven’t signed in.
Learn how to use this feature in our how-to guide.
Attendance Modes
Attendance modes allow you to capture the reason why your users have signed in or out outside of their expected working hours, helping you to understand why this absence occurred. You’ll be able to monitor attendance more effectively and it’ll save you time chasing up individuals to find out why they were late.
This is really useful for monitoring staff attendance in businesses and for both staff and pupil attendance in schools and education environments.
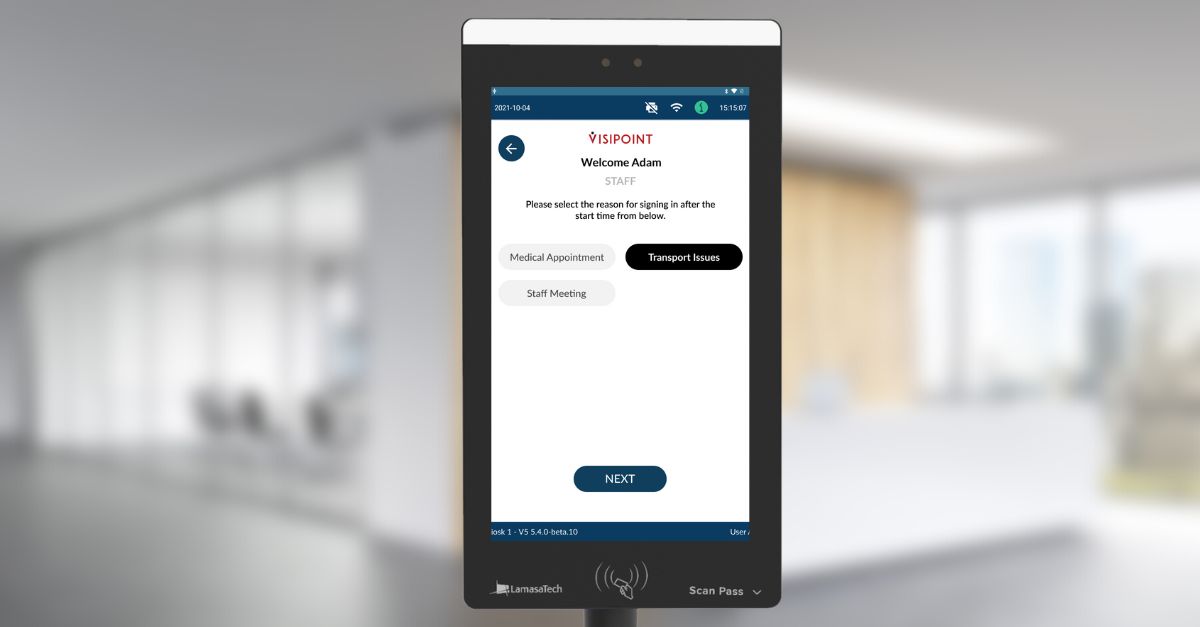
When you create an Attendance Mode you’ll set the attendance hours for your users. Then when a user attempts to sign in later than the defined start time or sign out early on your kiosks, they will have to provide a reason from a list of your pre-defined reasons. For example, you could add “medical appointment” as an early sign-out reason for your employees. Any staff member leaving work early for a doctor’s appointment would then be able to select this option when signing out.
The reasons you add will need to be assigned to either sign in or sign out so that the system knows when to present this reason. You’ll also choose the timeframe that this reason is available. For example, you could have “Transport Issues” as a reason for signing in late, then set that to be an accepted late sign-in reason from 9:05 AM-12 PM. Any of your employees who sign in during this period will be shown this as a reason they can select for their late arrival.
Learn how to use attendance modes in this guide.
User Access Levels
You can now pick from 3 user access levels when granting access to your dashboard. Depending on the level of access users are given they will only be able to access set areas of your dashboard. Doing this will help you to delegate certain roles to your staff to help manage the dashboard and control access to your system effectively.
The 3 access levels are:
- Admin
- Employee
- Fire Warden
Please note: For user access levels you must be subscribed to the VisiPoint Pro plan or above.
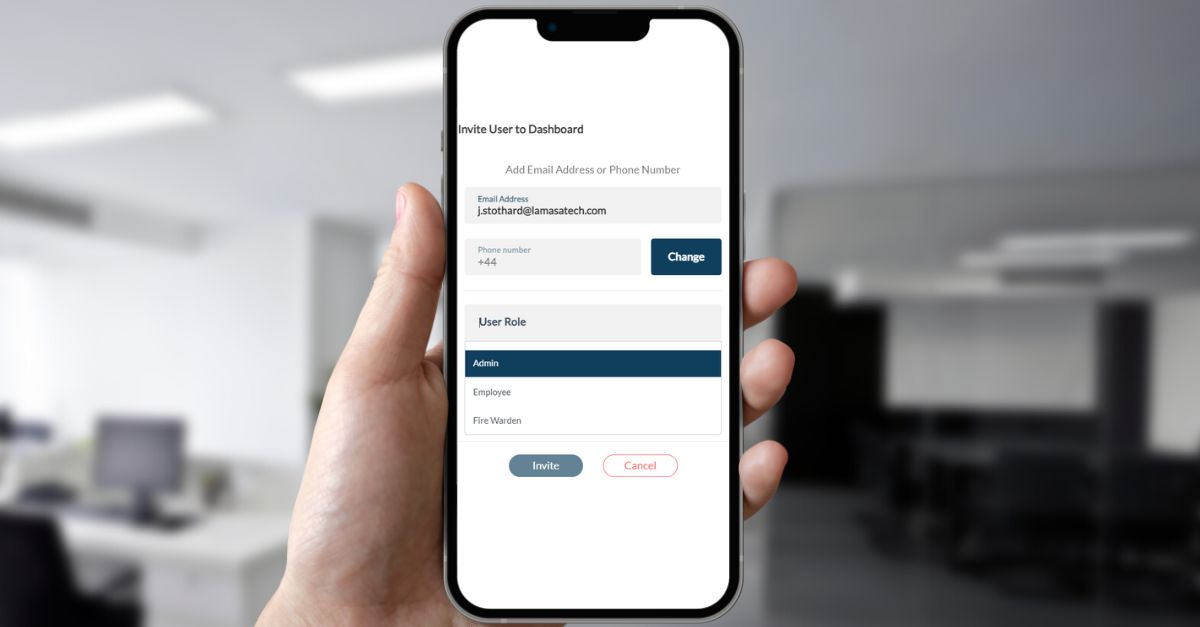
Admin
For full access to the dashboard, you can add users as Admins. They’ll be able to see and interact with everything on your dashboard. This will help to spread your workload as you’ll have other people to help you organise the dashboard, book visits and gather reports. Having multiple staff members with the Admin access level means there will be someone to cover in the event of an absence.
Employee
You may want staff members to be able to pre-register visitors for appointments, without being able to access the rest of your dashboard. These staff members can be invited to the dashboard with the Employee role. The only action they will be able to do is to book visits. Allowing staff to book their own visits means less workload for your Admin staff.
Fire Warden
You may have a member of staff, or multiple employees assigned as your Fire Wardens or responsible for evacuations. In this case, you can use the Fire Warden user role. This means they’ll only be able to use the Emergency List and Emergency Sessions. In the event of an evacuation, they’ll be able to instantly access the emergency list and act fast to ensure everyone is safeguarded during an emergency.
Learn how to set up new users here.
MIS Integration (UK Schools)
For UK schools, you can reduce the manual data work for your admin staff by integrating your pupil and staff directory from your MIS system. Depending on which MIS system you use, we offer read or full read/write integrations.
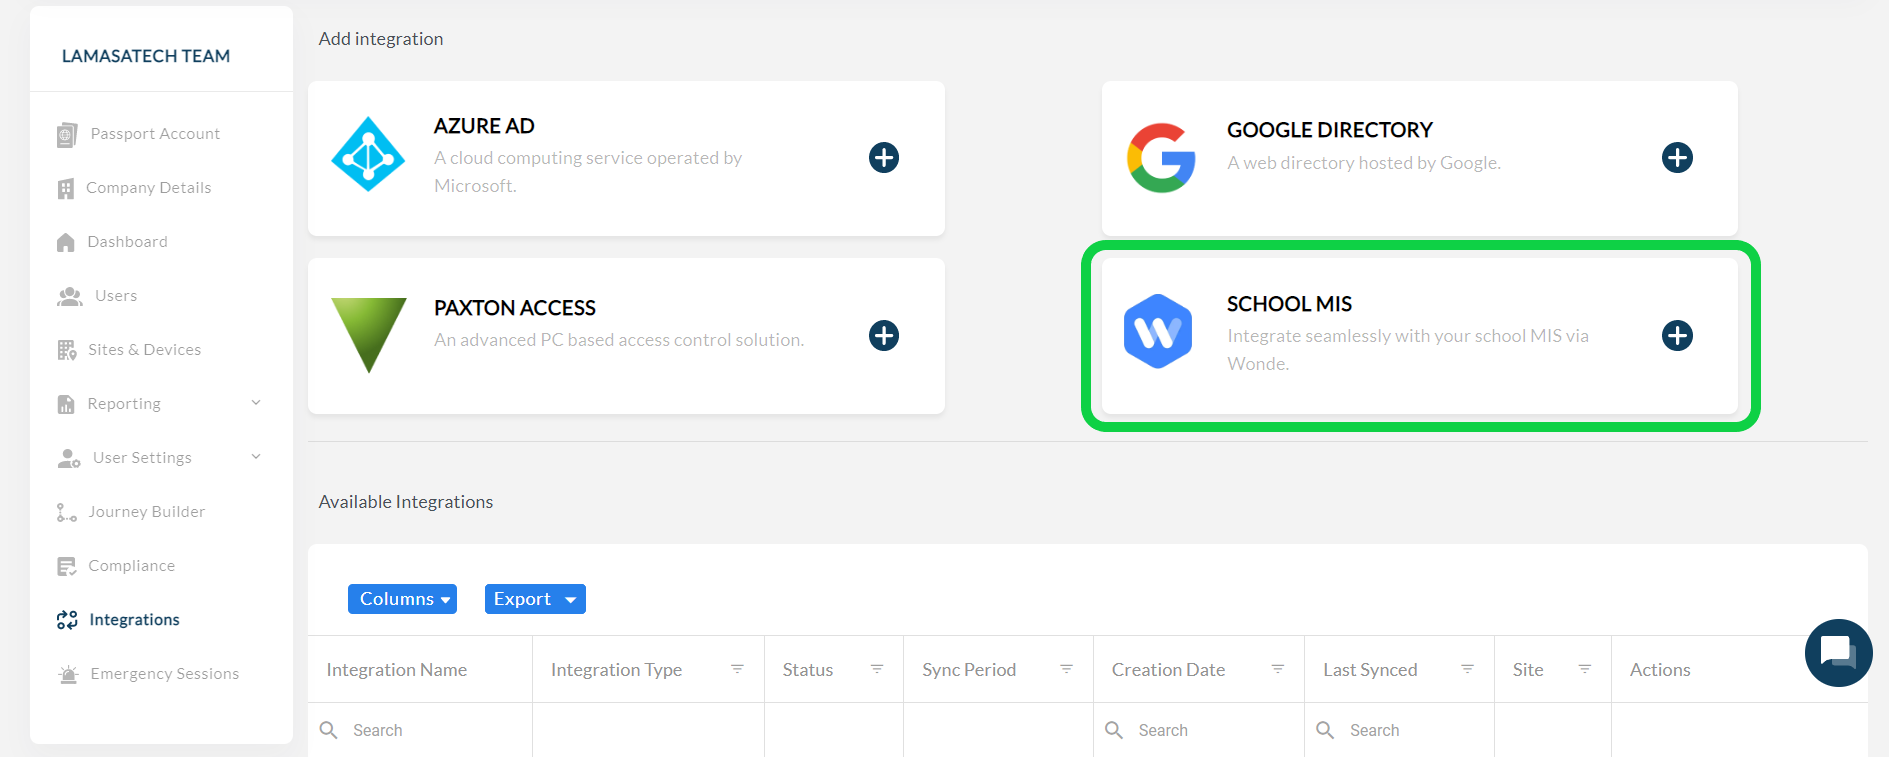
- Read integration:
Sync your pupil and staff information from your MIS system to VisiPoint, so you don’t have to manually import your user lists. - Read/write integration:
Sync your pupil and staff information from your MIS system to VisiPoint, so you don’t have to manually import your user lists. Plus, the sign-in information and attendance marks captured in VisiPoint will be written back to your MIS system.
Any changes you then make to your student and staff profiles on the MIS side will automatically be reflected the next time VisiPoint completes a sync process. Syncs can be set to happen at set intervals or you can manually start a sync to make sure your profiles are up-to-date.
Learn how to set up MIS integration here.
What’s Next
We aren’t stopping there! Here are a few features to look out for in the near future:
- VisiPoint Passport Mobile App – All users can download the VisiPoint Passport app on Android or iOS devices to access their QuickPass QR code and see their entry logs
- Archiving Users – Hide/view de-activated users in your user lists, such as employees who have left the business
- Custom fields – Create custom fields for users to complete during the entry process e.g. car registration number
We are always looking to provide features that meet the needs of our customers, which is why we continually update our product roadmap. If you have any ideas or requests, please submit a new idea here.
In the meantime, we’re here to help you implement the latest features. Full how-to guides are available on our VisiPoint online help centre. If you have any questions please contact our support team via the live chat from your VisiPoint dashboard, drop an email to cs@lamasatech.com or call us at + 44 (0) 191 622 0725.
If you have Zentron kiosks and would like to upgrade to a VisiPoint subscription please visit this page for more information or click on the green bubble to live chat with our team.